

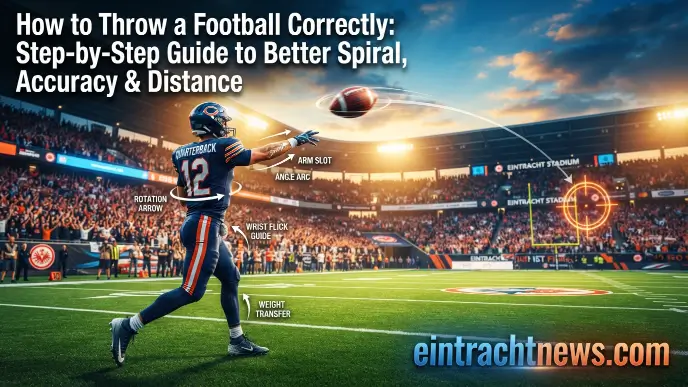
Throwing a football may seem easy when you watch experienced quarterbacks do it, but developing a strong and accurate throwing technique takes practice, coordination, and proper mechanics. Whether you’re practicing in the backyard, getting ready for your first football season, or simply trying to improve your passing skills, learning how to throw a football correctly is an important first step. Instead of relying only on arm strength, focusing on proper technique will help you develop a smoother, more consistent, and effective throw.
The good news is that anyone can improve their passing ability with the right instruction and regular practice. In this comprehensive guide, you’ll learn how to grip the football properly, use your entire body to generate power, create a tight spiral, improve accuracy and distance, and avoid common mistakes that can affect your throw. By practicing each step and focusing on proper form, you can become a more confident and capable passer.
Understanding the Basics of Throwing a Football
Before moving on to advanced passing techniques, it’s essential to understand the basics of football throwing mechanics. An effective pass depends on much more than arm strength—it requires proper balance, coordination, body rotation, timing, and overall technique. Many beginners make the mistake of trying to throw the ball as hard as possible, which can reduce accuracy and put unnecessary stress on the arm.
Learning the fundamentals first gives you a strong foundation to build on. Once you develop proper mechanics, you’ll be able to improve your accuracy, consistency, throwing power, and confidence as you continue practicing and developing your skills.
Why Proper Throwing Technique Matters
Using the right throwing technique offers benefits that go beyond simply completing a pass. Proper mechanics help you transfer power efficiently, improve accuracy, and place less unnecessary stress on your throwing arm. Rather than depending entirely on arm strength, an effective throwing motion combines your legs, hips, core, shoulders, and arm to create a smooth, controlled release.
Key Benefits of Proper Football Throwing Technique
- Improved passing accuracy: Better mechanics help you control the direction and placement of each throw.
- Tighter spirals: A well-executed release helps the football travel more smoothly and efficiently through the air.
- Greater throwing distance: Using your entire body allows you to generate more power without relying solely on your arm.
- More consistent performance: Good mechanics make it easier to repeat the same throwing motion during practice and games.
- Less unnecessary arm stress: Efficient technique can reduce excessive strain on the throwing arm.
- Greater confidence: Knowing you have reliable mechanics can help you feel more comfortable when passing in different situations.
These benefits become easier to notice with consistent practice. As your throwing technique develops, you can make more accurate passes, generate power more efficiently, and become a more confident and dependable passer on the field.
Equipment You’ll Need
You don’t need expensive equipment to learn how to throw a football, but having the right gear can make your practice sessions safer, more comfortable, and more productive. A properly sized football, supportive footwear, and a suitable practice space give you the right environment to work on your throwing mechanics and build confidence.
With the basic equipment in place, you can focus more on improving your grip, throwing motion, accuracy, and overall technique while making each practice session more enjoyable.
| Equipment | Purpose |
| Regulation or youth football | Provides the correct grip and feel for practice. |
| Athletic shoes or cleats | Improve balance and traction during throws. |
| Open practice area | Allows safe movement while practicing different passing distances. |
| Throwing partner | Helps develop timing and accuracy. |
| Training cones or targets | Improve precision through structured drills. |
| Water bottle | Keeps you hydrated during extended practice sessions. |
If you’re new to football, start with a ball that feels comfortable and secure in your hand. A football that is too large can make it harder to develop a proper grip and release, while one that is too small may not provide the feel you need for realistic game situations. Choosing the right equipment allows you to concentrate on improving your throwing technique instead of adjusting to gear that doesn’t fit your needs.
The right football can make practice more comfortable, productive, and enjoyable while helping you build confidence as you develop your passing skills.
Read Also: Where to Watch Navy Midshipmen Football vs. Army Football
How to Grip a Football Properly

A proper football grip is the foundation of an accurate and powerful pass. Even with solid throwing mechanics, an incorrect grip can result in wobbly passes, weak spirals, and inconsistent accuracy. Holding the football correctly gives you greater control, helps improve your wrist action, and creates a smoother, faster release.
A secure grip also makes it easier to produce a tight spiral. A well-spinning football can travel more efficiently through the air, remain stable during flight, and give receivers a better chance of making a clean catch. Whether you’re a beginner learning the fundamentals or an experienced quarterback fine-tuning your technique, mastering the correct grip is an important step toward throwing with greater accuracy, consistency, and confidence during practice and games.
Correct Finger Placement
Proper finger placement gives you better control of the football throughout the entire throwing motion, from the initial setup to the final release. A well-balanced grip also helps produce a tighter spiral, improves accuracy, and allows your hand and wrist to move naturally without unnecessary tension.
How to Grip a Football
Follow these steps to establish a comfortable and effective grip:
- Place your index finger near the tip of the football without resting it directly on the end.
- Position your middle and ring fingers comfortably across the laces.
- Keep your pinky finger toward the lower part of the football to provide additional stability.
- Place your thumb underneath the ball, roughly opposite your middle finger.
- Keep a small gap between your palm and the football rather than pressing your entire hand against its surface.
Leaving a little space between your palm and the ball gives your wrist more freedom to move during the throw. This can help create a smoother release and encourage a more consistent spiral as the football travels through the air.
Finding a Comfortable Grip
While the basic football grip works for most players, your hand size and personal comfort also play an important role. The best grip should feel natural and secure without creating unnecessary tension in your hand or fingers.
Tips for Finding the Right Grip
Keep these points in mind:
- Grip the football securely without squeezing it too tightly.
- Adjust your finger spacing based on the size and shape of your hand.
- Keep your wrist relaxed before starting the throwing motion.
- Practice your grip regularly until it feels comfortable and consistent.
- Make minor adjustments when needed while keeping the basic grip fundamentals intact.
A comfortable, repeatable grip gives you better control over the football and helps make each throw more consistent. With regular practice, a reliable grip can contribute to improved accuracy, confidence, and overall throwing technique.
Common Grip Mistakes
Many passing problems can be traced back to simple grip mistakes that are relatively easy to correct. Paying close attention to your hand and finger placement during practice can help prevent poor habits and improve your overall throwing technique.
Common Football Grip Mistakes
Watch out for these common errors:
- Gripping the football too tightly, which can restrict a smooth release.
- Placing your entire palm against the ball, reducing flexibility and control.
- Holding the football too deeply in your hand, making it harder to release cleanly.
- Positioning your fingers unevenly across the laces, which can affect the spiral.
- Changing your grip before every throw, making your technique less consistent.
- Copying another player’s grip exactly, even when it doesn’t feel comfortable or natural for your hand.
Correcting these mistakes and developing a consistent grip will give you better control of the football and help you produce tighter spirals and more accurate passes. With regular practice, the proper grip will become more natural and reliable.
The Correct Throwing Stance
A strong quarterback stance provides the foundation for an accurate and powerful throw. Before the football leaves your hand, your lower body helps create the balance, stability, and power needed for an effective pass. Many beginners focus primarily on arm strength, but successful throwing also depends heavily on proper footwork and body positioning.
By maintaining a balanced, athletic stance and coordinating your legs, hips, and core, you can generate power more efficiently and maintain better control throughout the throwing motion. Developing a solid stance can lead to greater accuracy, consistency, and throwing power while helping reduce unnecessary stress on your arm.
Foot Position
Your feet create the foundation for every effective football throw. Proper foot positioning helps you stay balanced, maintain stability, and transfer power from the ground through the rest of your body.
How to Set Up Your Throwing Stance
Follow these steps to establish a strong, athletic position:
- Keep your feet about shoulder-width apart for a stable base.
- Place your non-throwing foot slightly forward of your throwing foot.
- Bend your knees slightly so you remain athletic and ready to move.
- Stay on the balls of your feet rather than standing completely flat-footed.
- Avoid locking your knees or standing too upright.
This balanced stance helps you move smoothly in any direction while making it easier to transition into your throwing motion. It also gives you greater control when throwing on the move or adjusting to pressure during a play.
Body Alignment
Proper body alignment helps your entire body work together throughout the throwing motion. From your feet and hips to your core and shoulders, each part should remain coordinated to support better power, accuracy, and control.
Key Body Alignment Tips
Keep these fundamentals in mind:
- Point your shoulders toward your intended target to help guide the throw.
- Keep your head up and eyes focused downfield so you can track your target.
- Maintain a neutral back position without leaning too far forward or backward.
- Keep your shoulders relaxed to promote a smooth and natural throwing motion.
- Hold the football close to your chest as you prepare to throw.
Proper alignment helps transfer force efficiently from your lower body through your core and into your throwing arm. This coordinated movement can lead to tighter spirals, more accurate ball placement, and greater consistency with each pass.
Weight Distribution
Balanced weight transfer is one of the most important parts of effective football throwing mechanics, yet beginners often overlook it. Instead of depending entirely on arm strength, a good throw uses the entire body, with your weight moving smoothly from the back foot to the front foot as you complete the motion.
How to Transfer Your Weight Properly
A smooth weight transfer generally follows these steps:
- Start with your weight balanced between both feet.
- Shift slightly onto your back foot as you prepare and begin the wind-up.
- Step toward your target while moving your weight forward.
- Rotate your hips and shoulders together as you release the football.
- Finish with most of your weight on your front foot while completing the follow-through.
Proper weight transfer helps you generate throwing power more efficiently while maintaining better balance and control. It can also support improved accuracy, tighter spirals, and less unnecessary stress on your throwing arm. When combined with proper stance and body alignment, efficient weight distribution makes the entire throwing motion feel smoother, more controlled, and more natural.
How to Throw a Football Step by Step
Learning how to throw a football becomes much easier when you break the throwing motion down into simple, repeatable steps. Every accurate pass begins with proper body positioning and finishes with a controlled follow-through. Throughout the motion, your legs, hips, core, shoulders, and wrist work together to generate power and accuracy rather than relying solely on arm strength.
By practicing each step consistently and prioritizing proper technique over raw power, you can develop better muscle memory, produce a tighter spiral, improve passing accuracy, and become more confident with every throw.
Step 1: Lock Onto Your Target
Before starting your throwing motion, identify exactly where you want the football to go. Keeping your eyes on the target helps your body stay properly aligned and can improve both accuracy and consistency. Whether you’re passing to a teammate or throwing toward a practice target, staying focused can help you avoid unnecessary errors.
Tips for aiming effectively:
- Keep your eyes focused on the intended receiver.
- Avoid looking at the football while making the throw.
- Keep your shoulders aligned with your target.
- Picture the football reaching the target before you release it.
- Stay composed and avoid rushing the throwing motion.
The more consistently you practice focusing on your target, the easier it becomes to make accurate throws from different distances.
Step 2: Bring the Ball to Throwing Position
After choosing your target, bring the football into a comfortable throwing position near your ear or shoulder. Keeping the ball close to your body allows for a quicker and more controlled throwing motion while helping you maintain better control.
Remember these key points:
- Hold the football close to your dominant shoulder.
- Keep your elbow positioned slightly above shoulder level.
- Keep your wrist and forearm relaxed.
- Use your non-throwing hand to support the football until you’re ready to release it.
- Maintain a balanced and athletic posture.
A compact throwing position minimizes unnecessary movement and helps you release the football smoothly while maintaining control and accuracy.
Step 3: Rotate Your Hips
Much of the power behind an effective throw comes from the lower body rather than the arm alone. As you start the throwing motion, rotate your hips toward the target to build momentum. This movement transfers energy through your core and shoulders before reaching your throwing arm, allowing you to generate power more efficiently.
To maximize hip rotation:
- Begin with your hips slightly turned away from the target.
- Drive your front hip toward the target.
- Allow your shoulders to rotate naturally after your hips.
- Keep your core engaged throughout the movement.
- Avoid relying only on your upper body to create rotation.
Using your hips effectively can help increase throwing power while reducing the need to rely entirely on your arm.
Step 4: Step Forward
Proper footwork plays an important role in maintaining balance and directing the football toward your target. As your hips begin to rotate, step forward with your lead foot. This helps transfer your body weight smoothly and keeps your throwing motion aligned with the intended target.
A proper step should:
- Point toward your intended target.
- Feel natural and controlled rather than exaggerated.
- Remain aligned with your shoulders.
- Coordinate smoothly with your hip rotation.
- Transfer your weight onto your front foot.
Good footwork provides a stable foundation for the throwing motion and helps you combine balance, power, and accuracy more effectively.
Step 5: Release the Ball
The release is a crucial part of football throwing technique. As your arm moves toward the target, let the football roll naturally from your fingertips rather than pushing it out with your palm. A smooth release helps create a consistent spiral and gives you better control over the direction of the pass.
During release:
- Extend your throwing arm toward the target.
- Keep your wrist relaxed.
- Release the football from a consistent point in your throwing motion.
- Allow your fingertips to guide the ball.
- Avoid releasing the football too early or too late.
Developing a consistent release point can improve accuracy and make your passes more predictable and controlled.
Step 6: Snap Your Wrist
As the football leaves your hand, allow your wrist to snap naturally through the release. This action helps create the rotation needed for a tight spiral, allowing the football to travel smoothly and remain more stable in the air.
Benefits of a strong wrist snap include:
- Tighter spirals.
- Better control of the football.
- Improved passing accuracy.
- More efficient throwing mechanics.
- A more consistent flight path.
If your passes tend to wobble, practice your release and wrist action with shorter throws until the movement becomes comfortable and consistent.
Step 7: Follow Through
Your throwing motion doesn’t stop as soon as the football leaves your hand. A proper follow-through allows your body to complete the movement naturally while helping maintain balance, control, and consistency. Let your throwing arm continue across your body as your weight finishes over your front foot.
A complete follow-through helps:
- Maintain better passing accuracy.
- Improve throwing consistency.
- Promote smoother throwing mechanics.
- Complete the weight-transfer process.
- Reduce unnecessary tension in the throwing motion.
Think of the follow-through as the final part of the complete throwing motion. By practicing everything from your initial stance through the final follow-through, you can develop a smoother technique and become a more accurate and confident passer.
How to Throw a Tight Spiral Every Time
A tight spiral is one of the clearest indicators of proper football throwing mechanics. When the football spins cleanly through the air, it can travel more efficiently, maintain a stable flight path, and make it easier for the receiver to catch. A good spiral can also contribute to better accuracy and throwing distance.
Although throwing a perfect spiral may seem like something that comes naturally to experienced players, it is a skill that can be developed through proper technique and consistent practice. The right grip, a smooth release, proper wrist action, and coordinated body movement all play an important role in creating a tight, consistent spiral.
Why Spirals Matter
A football that wobbles in the air can experience greater drag, which may reduce its speed, stability, and accuracy as it travels toward the receiver. A tight spiral, on the other hand, provides a more stable flight and can make passes more consistent and easier to catch in a variety of game situations.
Benefits of throwing a spiral include:
- Greater passing accuracy.
- Improved throwing distance.
- Better ball stability during flight.
- Easier and more predictable catches for receivers.
- Increased confidence when passing.
As you continue developing your throwing mechanics, your ability to produce consistent spirals will improve. With regular practice, you can gain better control over the football and make your passes more accurate, stable, and reliable.
Release Tips
Your release plays a major role in producing a tight and consistent spiral. A smooth, controlled release allows the football to rotate naturally as it leaves your hand, while rushing the motion or trying to force the throw can lead to wobbling passes and reduced accuracy.
Keep these tips in mind:
- Release the football primarily from your fingertips.
- Avoid pushing the ball forward with your palm.
- Keep your grip relaxed as you approach the release.
- Let your elbow lead naturally through the throwing motion.
- Complete the throw with a smooth, controlled follow-through.
Developing a consistent release point takes practice, but it can make your throwing motion feel more natural. Over time, proper release mechanics can help you produce tighter spirals and more accurate passes.
Finger Roll Technique
The final interaction between your fingers and the football is an important part of producing a clean, tight spiral. As the ball leaves your hand, allowing it to roll naturally across your fingertips helps create the rotation needed for a more stable and controlled flight.
To develop a clean finger roll:
- Let the football roll naturally off your fingertips.
- Use your index finger to guide the final part of the release.
- Allow your wrist to snap naturally as the ball leaves your hand.
- Keep your fingers relaxed throughout the throwing motion.
- Start with slow, controlled passes before gradually adding more power.
With consistent practice, the finger-roll motion can become a natural part of your release. This helps you produce tighter spirals more consistently while making your overall throwing motion smoother and more efficient.
How to Throw Farther Without Hurting Your Arm
Many players assume that throwing the football farther is mainly a matter of having a stronger arm. In reality, longer passes depend on proper body mechanics, efficient energy transfer, and consistent practice. Experienced quarterbacks create power by coordinating their legs, hips, core, and shoulders, while the arm helps direct and complete the throw rather than generating all the force on its own.
By focusing on smooth and efficient mechanics instead of relying purely on strength, you can gradually improve your throwing distance while maintaining better accuracy and control. Efficient technique can also help you throw with less unnecessary effort and reduce excessive stress on the throwing arm.
Generate Power From Your Legs
Your legs provide the foundation for a powerful football throw. Similar to how athletes in other throwing and swinging sports generate force from the ground up, quarterbacks use their lower body to build momentum before the arm completes the throwing motion.
When you push off the ground effectively, energy moves through your legs, hips, core, and shoulders before reaching your throwing arm and the football. This coordinated sequence helps generate power more efficiently while reducing the need to rely entirely on arm strength.
To maximize leg power:
- Bend your knees slightly before starting the throwing motion.
- Drive through your back foot as you begin the throw.
- Maintain your balance throughout the movement.
- Step toward your target with controlled, purposeful footwork.
- Finish with most of your weight on your front foot after the release.
Developing efficient lower-body mechanics can help you generate more throwing power and distance while maintaining better balance and control. With consistent practice, your legs can become an important part of a smooth and effective throwing motion.
Use Hip Rotation
Your hips serve as the connection between your lower and upper body, making hip rotation an important part of an efficient football throwing motion. Rather than relying entirely on your arm, proper hip movement helps transfer momentum from your lower body through your core and into your upper body.
As your hips rotate toward the target, your shoulders and throwing arm can follow naturally. This coordinated movement helps generate power while keeping the throwing motion smooth and controlled.
Focus on:
- Rotate your hips before your shoulders to create an efficient sequence.
- Keep your core engaged throughout the throwing motion.
- Maintain smooth and controlled timing as your body rotates.
- Avoid sudden or forceful twisting movements.
- Allow your lower and upper body to work together throughout the throw.
Developing better hip rotation can help you use your body more efficiently when throwing. With consistent practice, improved hip movement can contribute to greater throwing power, better control, and a smoother overall technique.
Improve Core Strength
A strong core plays an important role in transferring power efficiently from your lower body to your upper body during a football throw. Your abdominal muscles, lower back, and obliques help stabilize your body throughout the throwing motion, allowing you to maintain balance, generate force, and stay in control of your release.
When your core is properly engaged, it helps connect the movement of your legs and hips with your shoulders and throwing arm. Without adequate core stability, some of the energy generated by your lower body may be lost before it reaches the football, making it harder to produce a smooth and powerful throw.
Helpful exercises include:
Adding core-focused exercises to your training routine can help improve stability and support efficient movement during a football throw. Useful options include:
- Planks
- Side planks
- Russian twists
- Medicine ball rotational throws
- Dead bugs
- Bird dogs
Consistent core training can support better balance, body control, and power transfer during the throwing motion. A stable core also helps you maintain proper positioning as you rotate and release the football, contributing to more controlled and efficient throwing mechanics.
Build Shoulder Mobility and Stability
Although much of your throwing power comes from your legs and core, healthy shoulders are also important for efficient and controlled passing. Good shoulder mobility supports a comfortable range of motion, while strong stabilizing muscles help your shoulder handle the demands of repeated throwing.
Adding mobility drills and light strengthening exercises to your routine can help support shoulder function and maintain good throwing mechanics.
Effective Shoulder Exercises
Consider including exercises such as:
- Resistance band external rotations
- Shoulder circles
- Arm swings
- Scapular push-ups
- Face pulls
- Dynamic stretching before practice
Keeping your shoulders mobile and well-conditioned can help you maintain a smooth throwing motion and reduce unnecessary fatigue during longer practice sessions. Start with controlled movements and focus on proper technique rather than trying to perform exercises with excessive resistance.
Avoid Overthrowing
One of the most common mistakes players make is trying to throw every pass with maximum force. Constantly forcing the football can disrupt your mechanics, reduce accuracy, cause unnecessary fatigue, and place extra stress on the throwing arm.
Rather than relying on raw strength, focus on allowing proper technique to generate power. A smooth and controlled throwing motion helps you use your entire body efficiently, resulting in more consistent and accurate passes. In most situations, good mechanics will produce better results than simply trying to throw as hard as possible.
To avoid overthrowing:
- Focus on smooth and consistent technique rather than trying to throw with maximum force.
- Increase your throwing distance gradually as your mechanics and coordination improve.
- Warm up properly before each practice session to prepare your body for throwing.
- Take regular breaks during longer throwing sessions to avoid excessive fatigue.
- Pay attention to how your body feels and stop practicing if you experience shoulder or elbow pain.
- Prioritize quality repetitions over trying to complete as many throws as possible.
As your technique, strength, and coordination develop, you’ll be able to generate more power naturally and throw farther without having to rely on excessive effort. Consistent practice and efficient mechanics are the keys to becoming a stronger, more accurate, and more confident passer.
Common Football Throwing Mistakes
Even players who understand the fundamentals can develop habits that negatively affect their throwing accuracy and consistency. Fortunately, most common mistakes can be corrected once you identify what is going wrong. Paying close attention to your mechanics during practice allows you to make small adjustments that can lead to noticeable improvements over time.
The table below covers some of the most common football throwing mistakes, explains why they occur, and provides practical tips to help you correct them and develop more consistent throwing mechanics.
| Mistake | Why It Happens | How to Fix It |
| Gripping the football too tightly | Causes tension in the wrist and fingers, making it difficult to release the ball smoothly. | Hold the football firmly but keep your hand relaxed to allow a natural release. |
| Throwing with only your arm | Ignoring the legs and hips limits power and puts extra stress on the shoulder. | Generate force from your legs, rotate your hips, and let your entire body contribute to the throw. |
| Dropping the elbow | A low elbow changes the release angle and often results in inaccurate or wobbly passes. | Keep your elbow at or slightly above shoulder level throughout the throwing motion. |
| Poor footwork | Incorrect steps reduce balance and affect both power and accuracy. | Step directly toward your target and maintain a stable athletic stance. |
| Leaning backward | Shifting your weight away from the target causes high or weak throws. | Transfer your weight forward as you release the football. |
| Weak follow-through | Stopping your arm too early reduces control and consistency. | Allow your throwing arm to continue naturally across your body after release. |
Correcting throwing mistakes takes time, patience, and consistent practice. Instead of trying to change every part of your technique at once, focus on one specific issue during each practice session. This approach makes it easier to identify progress and build better habits without becoming overwhelmed.
Small adjustments to your throwing mechanics can lead to noticeable improvements over time. With regular repetition and a focus on proper technique, you can gradually develop a smoother, more accurate, and more consistent throwing motion.
Best Drills to Improve Your Throwing Skills
Consistent practice is essential for mastering football passing mechanics. While casual throwing can help you become more comfortable with the football, structured drills provide a more effective way to develop accuracy, timing, footwork, throwing power, and overall technique.
Each drill can focus on a specific part of your throwing motion, helping you build muscle memory and correct mistakes before they become difficult habits to change. By adding targeted passing drills to your regular training routine, you can gradually improve your consistency, control, and confidence every time you step onto the field.
Wall Target Drill
The wall target drill is a simple and effective way to practice football throwing accuracy without needing a partner. Because the football rebounds after each throw, you can perform repeated passes while concentrating on hitting your targets consistently. The drill also helps you develop a more reliable release point and improve overall ball control.
How to perform it:
- Mark several targets on a sturdy wall.
- Stand approximately 10–15 feet away.
- Throw the football toward each target while maintaining proper throwing mechanics.
- Focus on hitting the center of each target with a controlled throw.
- Gradually increase the distance as your accuracy and consistency improve.
- Repeat the drill for several sets, taking breaks as needed.
Try to hit the center of each target as consistently as possible rather than focusing on throwing with maximum power. With regular practice, the wall target drill can help improve your accuracy, release consistency, ball control, and confidence when making precise passes.
Partner Accuracy Drill
Practicing with a partner is a great way to simulate real-game passing situations. It allows you to work on timing, ball placement, and communication while giving you immediate feedback on the quality of your throws. As your accuracy improves, you can gradually increase the distance or introduce movement to make the drill more challenging.
To perform the drill:
- Stand about 15–20 feet apart.
- Aim each throw toward your partner’s chest area.
- Focus on producing controlled, tight spirals.
- Gradually increase the distance after completing several accurate passes.
- Switch positions to practice throwing from different angles.
The goal is to consistently deliver passes that are easy for your partner to catch. With regular practice, this drill can improve your accuracy, timing, ball placement, and confidence in game-like passing situations.
One-Knee Drill
The one-knee drill removes most lower-body movement, allowing you to concentrate on your upper-body mechanics, wrist action, and release. With your legs providing less assistance, you can better identify whether your arm path, grip, and finger placement are working correctly.
Steps:
- Kneel on your throwing-side knee.
- Keep your upper body upright and balanced.
- Grip the football correctly before starting the throw.
- Use controlled arm mechanics and a natural wrist snap.
- Focus on producing a clean, consistent spiral.
- Start with short throws and prioritize technique over power.
Practicing this drill regularly can help you develop a smoother release, more consistent spirals, and better control of your throwing mechanics. Once the movement feels comfortable, you can gradually return to a full throwing stance and apply the same technique.
Quick Release Drill
A quick release is an important skill for quarterbacks who need to make decisions and deliver passes efficiently under defensive pressure. This drill helps you practice moving the football from the ready position into the throwing motion quickly while maintaining control, accuracy, and proper mechanics.
Practice by:
- Hold the football in a comfortable ready position.
- Respond to a visual or verbal signal.
- Quickly bring the football into your throwing position.
- Deliver a controlled and accurate pass.
- Repeat the sequence for several repetitions.
As the movement becomes more comfortable, gradually increase your speed while keeping your mechanics consistent. The goal is to become quicker without sacrificing accuracy, balance, or proper throwing form. Regular practice can help you develop a smoother release and react more efficiently in game-like situations.
Distance Progression Drill
Building throwing distance gradually is a more effective approach than immediately attempting maximum-distance passes. A progressive approach allows you to develop your throwing mechanics and coordination while gradually increasing the demands placed on your arm.
Try this progression:
- Begin with short throws of around 10 yards.
- Move up to 20 yards once you can maintain good accuracy and control.
- Progress to 30–40 yards as your mechanics remain consistent.
- Focus on efficient technique rather than trying to throw as hard as possible.
- Take regular breaks between longer throws to avoid excessive fatigue.
As your technique, coordination, and strength develop, you may find that the football travels farther without requiring as much effort. Following a gradual progression can help you build throwing consistency and power while keeping your practice sessions controlled and manageable.
Beginner Tips for Faster Improvement
Learning how to throw a football takes time and practice, but using the right approach can help you improve more effectively. Rather than focusing only on throwing farther or harder, concentrate on developing consistent mechanics and good habits from the beginning. A strong foundation can improve your accuracy, spiral, and confidence while making it easier to develop more advanced throwing skills over time.
Keep these tips in mind:
- Warm up properly by preparing your shoulders, arms, and legs before throwing.
- Practice consistently, even if each session lasts only 15–20 minutes.
- Prioritize proper technique before trying to increase throwing power.
- Record your throwing motion to identify mistakes and track your progress.
- Increase throwing distance gradually instead of forcing long throws.
- Stay relaxed throughout the throwing motion to avoid unnecessary tension.
- Be patient with your progress and focus on steady improvement rather than immediate results.
Small improvements made consistently can lead to significant results over time. Even experienced quarterbacks spend years refining their throwing mechanics through regular practice and repetition. By following these simple tips and staying committed to your training, you can develop better accuracy, stronger mechanics, and greater confidence every time you step onto the field.
Frequently Asked Questions
Can I learn how to throw a football without a coach?
Yes. By practicing the correct techniques, following structured drills, and reviewing your throwing form regularly, you can build solid fundamentals even without professional coaching.
What size football should beginners use?
Beginners should choose a football that matches their age and hand size. Using the right-sized ball makes it easier to grip, control, and develop proper throwing mechanics.
How long does it take to improve football throwing skills?
The timeline varies depending on practice frequency, but most beginners notice better accuracy and spirals after several weeks of consistent, focused training.
Should I practice throwing every day?
Daily practice is helpful if sessions are short and your arm gets enough rest. Quality practice with proper recovery is more effective than overtraining.
What’s the best way to track my throwing progress?
Record your practice sessions, measure your passing accuracy and distance, and compare your technique over time to identify improvements and areas that need more work.
Conclusion
Learning how to throw a football involves much more than simply getting the ball from one player to another. Proper grip, balanced footwork, effective hip rotation, a smooth release, and a controlled follow-through all contribute to accurate, powerful, and consistent passes. By developing these fundamentals, you can improve your overall throwing technique while avoiding unnecessary strain on your throwing arm.
Progress takes time, so don’t expect perfect results after just a few practice sessions. Each workout gives you another opportunity to refine your mechanics and build better habits. Focus on quality rather than maximum power, practice the drills covered in this guide, and address common mistakes as you notice them. With patience, repetition, and consistent technique, you can develop tighter spirals, better accuracy, greater throwing distance, and more confidence in a variety of football situations.
